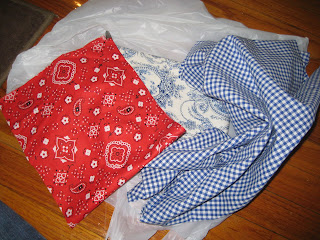
On Friday morning, Stacey, Ashley, and I opted to skip the gym and have a craft day! We’d visited the fabric shop the day before and each picked a few fabrics to make wreaths with. (That was part of what made my morning crazy – three little boys running wild in a fabric warehouse, climbing ladders, calling it a playground, etc.) Friday morning, Stacey’s and my little guy were having their last day of Mom’s Day Out for the year, so we only had one little boy and Neely to worry about. We met at Michael’s to get the last of our supplies, then gathered in the floor at Ashley’s house to get to work.
If you want to attempt this easy-peasy project, here’s what you need:
18-inch straw wreath
three or more coordinating fabrics, about 1/2 yard of each (if you want your wreath to be fuller than mine is, get more)
scissors (you can use pinking shears, too)
a crochet hook (a chopstick also works well)
ribbon
paper mache letter
spray paint


To start out, cut all your fabric into strips. They should be about 1-1/2 inch wide and 6 inches long. Actually, you don’t have to cut all your fabric first. I did. You could do it like Ashley and cut them as you go. She didn’t have the patience to cut all her fabric at one time.
Next, start stuffing fabric into your wreath using the crochet hook (I don’t know enough about crochet to tell you what size, but it has to be one with a small end.) Spread your fabric out to begin with, maybe 1/2 inch to 1 inch between each piece, and then fill in the holes once you’ve gotten the whole thing covered. You don’t want to run out of fabric. And make sure that you stuff fabric in around the sides and in the middle, so none of the straw shows when you hang it.
By the time I finished cutting all my fabric into strips, Stacey was over halfway done with her wreath.

So was Ashley.

Here’s mine. I’m slow. I also started out putting my fabric way too close together. I had to pull a bunch out and nearly start over.

Once you have your fabric stuffed into your wreath, you can hang your letter. Wait, whoops! I need to back up. Before you start anything else, go ahead and spray-paint your initial so that it’s dry by the time you’re ready for it. We were impatient, so we only did one coat of paint. If it starts to weather and look bad, I’ll give it a touch-up coat. No sweat.
Okay, NOW you can hang your letter inside your wreath. If you’re like me and have a “good” letter, you can loop your ribbon around the top and then around the top of your wreath. I tied a bow at the top of mine, too. It doesn’t really matter. You can’t really see it in all the wonderful scrappiness. If you’re unlucky and have a letter like “L,” like Ashley, you may have to staple your ribbon to the back and then tie it around the top of your wreath.
Once you’ve got your initial secured, your ragamuffin wreath is ready to adorn your front door, or wherever else you’ve decided to use it. The only thing I’m not sure of is how weather-proof these are. It rained here last night, and I brought mine in just in case.
If you decide to tackle this project, have fun! It’s super-easy!
There's mine again, just in case you forgot what it looked like.


I made a million of these "back in the 90's". I even made one as a presentation in speech class. I made squares instead of strips and used a flat head screw driver to stuff instead of a hook. It was so easy. I may have to make some more.
ReplyDelete